How To Fix & Update NVIDIA Drivers in Windows 10?
[:en]
Windows 10 users normally face various issues related to the working of NVIDIA graphic drivers. Upgrading the system to Windows 10 may sometimes cause display issues. This blog post lists some of the most common NVIDIA Drivers Issues in Windows 10 and the solutions to overcome these issues in simple steps.
Read further to know more about How to Fix Windows 10 Nvidia Driver Issues. Each section describes a different error and its solution.
The 3 main NVIDIA Drivers Issues discussed below are:
- NVIDIA driver not compatible with Windows 10
- NVIDIA installer failed issue
- Outdated NVIDIA drivers – How to update NVIDIA drivers in Windows 10
 Nvidia Driver Not Compatible With Windows 10
NVIDIA recently launched an update for its latest 1000 series graphics cards compatible with the Windows 10 anniversary update. However, the recent update is not installing for several users running their systems on the latest Windows 10 anniversary update. Windows displays an error message stating the graphics driver is not compatible with Windows 10. As of result of this, users are unable to install the latest version of Windows 10 NVIDIA driver using the normal driver installer.
The reason behind this is the new update introduced by Windows that has brought about a change in the way drivers are recognized by the Operating System. It is necessary for all the drivers to be WHQL certified. Windows doesn’t permit non-WHQL certified drivers to install.
The concern can be resolved by removing the previous drivers from the system. You can manually remove the drivers from your PC and then use the Windows update to install Windows drivers. In case, no updates are available, you can manually install the drivers via Device Manager.
If you are having difficulty doing the steps manually, you can use Driver Restore. It will scan and provide you with the best-matched drivers. You can use it to update NVIDIA driver for Windows 10 without any problem. You can contact support for further assistance regarding NVIDIA geforce driver not installing on Windows 10 issue. The last section of the blog describes the step-by-step approach to update the driver using this driver update software, Driver Restore.
Also Check Out: How to use Driver Restore to download and update drivers on Windows 10
How To Install NVIDIA drivers via Windows updates
As discussed above, apart from the official website, NVIDIA drivers can also be downloaded from Windows updates. The drivers available on the Windows update are WHQL certified.
Go to the Settings app > Update & security > Windows update and click on Check for updates.

Allow Windows 10 to check if there are any NVIDIA drivers available to download. Most likely an update will be available to install. Wait until that update has been installed along with the others. If everything goes in the correct manner, the NVIDIA graphics driver will be successfully installed in your computer. If there is no update available in the Windows updates section, you will have to manually update the driver.
How to Disable driver signature check using advanced reboot menu
One of the concerns now is that, Windows 10 will not allow the installation of non-WHQL certified drivers. To resolve this, follow the mentioned steps to temporarily disable the driver signature check in Windows 10:
- Go to Settings app > Update & security > Recovery. Click on Restart now below the Advanced startup headline.
- Once your PC has booted to the Advanced start menu, click on Troubleshoot and then go to the Advanced settings.
- Click on Startup settings. You will be presented with a list of options which you can select with the help of function keys on your keyboard. The one which you need to select is the one with Disable driver signature enforcement. Most likely it will be the F7 key that needs to be selected.
- Once you have booted up your system, visit the NVIDIA’s website and download the latest drivers for the graphics card. After installing the drivers, restart your PC.
Also Read: Fix Bluetooth Not Working in Windows 10
How to fix “NVIDIA installer failed” issue in Windows 10?

Many Windows 10 users receives an Error message – “NVIDIA Installer failed” after upgrading the PC to Windows 10, you may come across this issue where the NVIDIA installer fails.
When you update the system to Windows 10, the Windows update attempts to download and install the graphic drivers. The process may be achieved within 5-10 minutes or take some more time.
However, in case you try to update NVIDIA graphic drivers quickly, it is possible you may encounter the error, “NVIDIA installer failed”.
Below mentioned are 3 different methods to fix NVIDIA installer failed problem.
Method 1.
In order to resolve the concern, the easiest way out is to let your computer sit idle for 15-20 minutes to ensure the downloading and installation processes have been accomplished by Windows Update. Following the completion of the processes, reboot the system.
In order to install the NVIDIA Driver, use the following steps:
- In the Installation options screen, select Custom
- Click Next
- On the next screen, check the box “Perform a clean installation”
- Click Next
- Follow on-screen instructions to complete the installation
- Reboot the system
In case, the drivers fail to install in a proper manner, try the next suggested methods.
Also Read: How To Fix HP Printer Drivers Windows 10 Issues?
Method 2
For this particular solution, ensure you turn off the antivirus and firewall before carrying out the installation process. A very few antivirus and firewall software block necessary files required during the NVIDIA driver installation.
As a result, the installation process fails to provide the appropriate results. Hence, turn off the firewall and antivirus programs before installation process.
Also, disable the antivirus-related activities running in the background. You can do this by closing those activities in the Task Manager.
Follow the below mentioned steps to temporarily turn off your system’s antivirus and firewall softwares:

- Press Ctrl+Alt+Delete
- Click Task Manager
- Go to the Processes tab
- Look for any processes related to antivirus and kill each of them – Click on each process and select End Task to kill the process
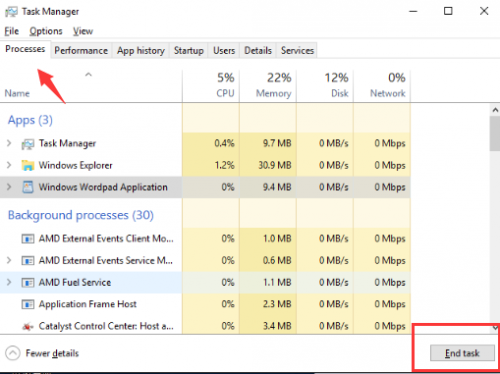
- Reboot your PC
- Try installing the NVIDIA Driver. Select Custom and check the box “Perform clean installation” during installation
In case, still you are unable to achieve the required results and receive the NVIDIA installation error, refer to the steps suggested in method 3 to overcome the issue.
Also Read: How to Update Drivers in Windows 7 Manually?
Method 3
- Go to Task Manager
- Go to the Processes tab to end any NVIDIA processes
- You also need to delete some NVIDIA installation related files
- In order to delete any NVIDIA related files, log in as administrator
- Delete the following files from the C: drive:
- C:\Windows\System32\DriverStore\FileRepository\nv_lh file
- C:\Windows\System32\DriverStore\FileRepository\nvdsp.inf file
- C:\Windows\System32\DriverStore\FileRepository\nvoclock file
- C:\Program Files (x86)\NVIDIA Corporation\
- C:\Program Files\NVIDIA Corporation\
After deleting the NVIDIA files, reboot the system and try installing the NVIDIA Drivers again.
Conclusion: If none of the suggested methods work in favor and you still encounter the NVIDIA installer error, try reinstalling the Windows.

Outdated NVIDIA drivers in Windows 10
There are chances that your NVIDIA graphic card doesn’t work after upgrading the PC to Windows 10. In this case, you can resolve the issue by updating the graphic card driver. You can successfully update the driver using two methods.
The two methods are:
- Update NVIDIA drivers Windows 10 manually
- Update NVIDIA drivers Windows 10 automatically (Recommended)
Also Read: Fix Windows 10 Activation Errors
How To Update NVIDIA drivers Windows 10 manually ?
- Check the model of your NVIDIA Graphic driver(eg: GeForce Driver Windows 10 64-bit ). You can know about the specific model from the hardware.
- Visit the official website of NVIDIA. Look for the DRIVERS tab at the top menu then select All NVIDIA Drivers.
- You need to select the Product Type, Product Series, Produce Model and Operating System. Ensure to select the correct details for the required fields in order to get the right driver. Click on SEARCH button.
- The downloaded file will be an executable file (.exe file). You can install the driver by just double-clicking on it and follow the on-screen instructions to install the driver.

In case, the suggested steps failed to install the driver, you can install it manually step by step through Device Manager.
Follow the mentioned steps to update the drivers manually:
- In Device Manager, expand category Display adapters
- Find NVIDIA Graphics card device under this category
- right-click on it and select Update Driver Software from the pop-up menu
- update the driver manually.
Update NVIDIA drivers Using Driver Restore
Manually performing NVIDIA drivers update Windows 10 might be troublesome and time-consuming task. Often you may be unable to find the right driver and the end result may be disappointing. A smart and convenient way to update your NVIDIA driver in Windows 10 is by using Driver Restore.
Click the button given below to get Driver Restore directly.

Driver Restore, is a widely used driver update software to fix outdated or missing drivers in Windows 10, 8.1, 8, 7, Vista & XP. Described below is a step-by-step instruction plan to help update your driver using Driver Restore.
To update NVIDIA drivers in Windows 10 using Driver Restore, follow the mentioned steps:
- Driver Restore is a driver update software that scans the system to provide a list of drivers that need to be updated
- In addition to your NVIDIA graphic driver, all of the missing or outdated drivers will be listed in the Driver Restore window with a red-cross icon against their names
- You can only update one driver at a particular time. Select the NVIDIA graphic driver and click ‘Update Selected Driver’ button from the right panel
- The updating process will commence thereafter and the software will start downloading the updated version of the NVIDIA graphic driver
- A pop-up window will appear once the file is downloaded asking you to install/open the downloaded file
- Click ‘yes’ to further continue the process. The step will open a new window for a normal installation process
- To make sure the NVIDIA graphic driver has been correctly installed, a pop-up window will appear asking for the same. In case, the driver is successfully installed, click ‘Yes’, if not, select ‘No’
- After the successful installation of the driver, it is recommended that you restart the system. However, you can select to restart the system later without affecting the installation process
Related Posts:
- How To Protect Your PC From WannaCry Ransomware
- How To Fix Run Time Error ‘339’ In Windows?
- How To Fix ‘USB Not Detected’ & Connectivity Issues In Windows 8?
[:]